How Do I Adjust The Speed Of A Door Closer?

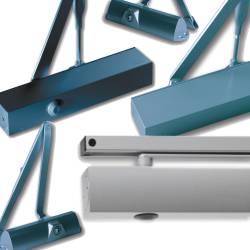
Door closers are an integral feature of commercial and public buildings, and they have a primary purpose of providing a safety, security and environmental function. The most common type of door closer is a rack and pinion door closer, which is a hydraulic mechanism that is attached to the top of a door with a hinged arm that is connected at one end to the door and at the other to the door frame. When a door closer of this style is installed it will be left as a default setting, but you can adjust the door closer to control the speed in which it closes and therefore to suit the environment the door is functioning in.
Why would I need to adjust the speed of a door closer?
In commercial or public buildings you need a door to close properly for fire safety reasons, but also for security and for heating and temperature control. But the speed in which the door closes may be particularly important in some environments, for example:
- If there are specific security risks and the door is closing too slowly
- If there is adverse weather and the door is closing too slowly
- If you are in a healthcare setting and people are walking slowly through a door and it is closing too quickly
- For disabled access in any type of building
- In hospitality, retail, warehousing or offices where people are often carrying or transporting something through a door
How does a door closer work?
The three main components which control a door closer are the three hydraulic valves, which are usually contained beneath a cover in the main box attached to the door, and all act at different stages of the arc in which the door sweeps around to close. These three valves are:
- Backcheck – this is an optional but very popular feature which provides resistance to prevent a door from slamming shut, or from simply closing too fast. You can adjust this valve to slow the swing and control the speed. This valve is usually located on its own away from the hinges.
- Sweep – this is also known as the ‘main speed’ valve. This controls the movement of the door from its open position to the point slightly before it hits its latching point. This valve is usually located in the middle of the three.
- Latching speed – this valve is actioned before the latching point and after the sweep/main speed valve to control the closing speed. It is usually the valve closest to the hinge.
How do I change the speed of a door closer?
The three valves described above can all be adjusted by turning them clockwise or anti-clockwise to adjust how they are actioned and hence how they control the speed of the door closing. It is important to note that there are no optimum positions for the valves, they will be left in a default position. This is because all doors are different in terms of their size, weight, width and the environment they are working in, but the door closer is always the same. So it is completely normal to have to adjust the door closer to suit your environment and operations.
You may need a screwdriver, a hex key or a small wrench to make these adjustments, but it does depend on what design of door closer you have.
- If the main door closer box has a cover you will have to remove this, otherwise you can’t see the valves. The cover will either slide off or you will have to loosen the fasteners holding it on, but this is very straightforward
- Initially close all the three valves by turning them clockwise
- Starting with the backcheck valve and then the sweep/main speed valve and finally the latching speed valve, make adjustments by turning each valve in turn to adjust the door speed.
- Anti-clockwise turns will speed the door closer up, clockwise turns will slow it down
- Make small adjustments at a time, maybe a quarter turn for example, because any slight turn will have quite a big effect
- Keep operating the door to see how the speed is changing, until you find the closing conditions you want.
- Be careful not to completely unscrew the valves as you may make the door closer malfunction, or you may end up damaging the unit and the door itself
- Replace the cover when you have completed your adjustments
- Monitor the door’s functionality day-to-day to ensure it still provides the safety, security and environmental functions you require
* Please note this is a basic guide for informational purposes only, always consult a professional on such an installation.